2048 game in few steps on AWS-EKS
Create an EKS cluster and deploy 2048 game into that cluster
==================================================
Task 1: Create an EKS cluster
=============================
Name: <yourname>-eks-cluster-1
Use K8S version 1.25
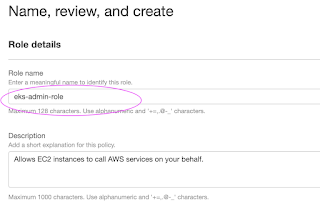
Create an IAM role 'eks-cluster-role' with 1 policy attached: AmazonEKSClusterPolicy
Create another IAM role 'eks-node-grp-role' with 3 policies attached:
(Allows EC2 instances to call AWS services on your behalf.)
- AmazonEKSWorkerNodePolicy
- AmazonEC2ContainerRegistryReadOnly
- AmazonEKS_CNI_Policy
Choose default VPC, Choose 2 or 3 subnets
Choose a security group which open the ports 22, 80, 8080
cluster endpoint access: public
# For VPC CNI, CoreDNS and kube-proxy, choose the default versions, For CNI, latest and default are
# different. But go with default.
Click 'Create'. This process will take 10-12 minutes. Wait till your cluster shows up as Active.
Task 2: Add Node Groups to our cluster
======================================
Now, lets add the worker nodes where the pods can run
Open the cluster > Compute > Add NodeGrp
Name: <yourname>-eks-nodegrp-1
Select the role you already created
Leave default values for everything else
AMI - choose the default 1 (Amazon Linux 2)
change desired/minimum/maximum to 1 (from 2)
Enable SSH access. Choose a security group which allwos 22, 80, 8080
Choose default values for other fields
Node group creation may take 2-3 minutes
Task 3: Authenticate to this cluster
===================================
Reference:
https://docs.aws.amazon.com/eks/latest/userguide/create-kubeconfig.html
Open cloudshell
# Type on your AWS CLI window
aws sts get-caller-identity
# observe your account and user id details
# Create a kubeconfig file where it stores the credentials for EKS:
# kubeconfig configuration allows you to connect to your cluster using the kubectl command line.
aws eks update-kubeconfig --region region-code --name my-cluster
ex: aws eks update-kubeconfig --region us-east-1 --name unus-eks-cluster-1 # Use the cluster name you just
created
# see if you can get the nodes you created
kubectl get nodes
# Install nano editor in cloudshell. We will need this in the next task
sudo yum install nano -y
Task 4: Create a new POD in EKS for the 2048 game
================================================
# clean up the files in cloudshell (Optional)
rm *.*
# create the config file in YAML to deploy 2048 game pod into the cluster
nano 2048-pod.yaml
### code starts ###
apiVersion: v1
kind: Pod
metadata:
name: 2048-pod
labels:
app: 2048-ws
spec:
containers:
- name: 2048-container
image: blackicebird/2048
ports:
- containerPort: 80
### code ends ###
# apply the config file to create the pod
kubectl apply -f 2048-pod.yaml
#pod/2048-pod created
# view the newly created pod
kubectl get pods
Task 5: Setup Load Balancer Service
===================================
nano mygame-svc.yaml
### code starts ###
apiVersion: v1
kind: Service
metadata:
name: mygame-svc
spec:
selector:
app: 2048-ws
ports:
- protocol: TCP
port: 80
targetPort: 80
type: LoadBalancer
### code ends ###
# apply the config file
kubectl apply -f mygame-svc.yaml
# view details of the modified service
kubectl describe svc mygame-svc
# Access the LoadBalancer Ingress on the kops instance
curl <LoadBalancer_Ingress>:<Port_number>
or
curl a06aa56b81f5741268daca84dca6b4f8-694631959.us-east-1.elb.amazonaws.com:80
(try this from your laptop, not from your cloudshell)
# Go to EC2 console. get the DNS name of ELB and paste the DNS into address bar of the browser
# It will show the 2048 game. You can play. (need to wait for 2-3 minutes for the
# setup to be complete)
Task 3: Cleanup
---------------
# Clean up all the resources created in the task
kubectl get pods
kubectl delete -f 2048-pod.yaml
kubectl get services
kubectl delete -f mygame-svc.yaml
####################################################################
Adding Screenshots of process


Labels: aws aws cli linux devops, kubernetes aks
posted by Hariom Kumar @ January 13, 2024
0 Comments
![]()